Stonehenge
More actions
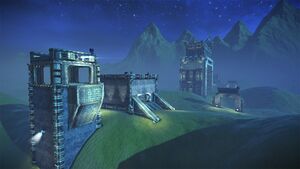
Stonehenge is a Capture the Flag map in Tribes: Ascend. It is a remake of a classic Tribes 1 map of the same name. This map was the first night-time CTF map in Tribes: Ascend.
Terrain
The terrain on Stonehenge is rolling hills covered with grass. There is rain although the sky is clear enough to see the moon and several constellations. A few rock formations can be seen beyond the maps' boundaries. The center of the map is dominated by a large structure that might be some kind of landing pad.
Base
The teams flag is in a tower behind the main base and is only open to the front, back and sides. The main building houses the Generator and two Inventory Stations, which are accessed by shafts/conduits. There are two additional Stations on the roof along with a Base Turret. The Radar Sensor is above the flag and there is another turret on a seperate structure to the left of the main base. The Vehicle Pad is to the right of the base.
Offense
Flag Routes
One route is to start on top of the middle structure, at the very edge of one of the two outside projections (not the middle one), and use the thrust pack to ski across the top of the structure to the projection opposite the one that the capper started on (skiing towards the enemy base). Using a grenade jump at the very edge of the projection, the capper will need lttle energy to get to the roof of the enemy base, where another thrust is usually enough to go past the base turret and grab the flag, exiting at the rear.
Defense
Flag Defense
The roof over the flag stand and corner pillars make defending the flag on Stonehenge much more feasible than many other maps. Also because the Inventory Stations are so close rearming is much easier. Additionally, the Radar Sensor is right above the flag, so defenders will almost always know when it goes down and be able to repair it quickly.
Placing Force Fields in the front or back openings on the stand will make placement of additional side-facing FF's difficult as there is not room to place them far enough apart. If you can manage 2 FF's (which is possible, since the Inv. Stations are close by) place them across the side routes since you can deploy two with enough room. Mines can be placed a few feet in from each corner so that their radii will reach close to the stand, right next to the pillars won't reach and cappers will ski between them. If the generator is up and you have FF's then you can place mines across the front/back openings more than the sides to better seal them. Currently flag routes are still being developed, and cappers often miss and are easy prey for the new Titan Launcher, but of course the Chain Gun/Chain Cannon are probably the weapon of choice.
Generator Defense
The Generator room on this map has two entrances, both of which require players to jet up into the building. The easiest way to defend the gen is to cover these holes with Mines, Force Fields, and/or Light Turrets and backing them up. The two Inventory Stations inside the gen room make for easy rearming (many players think it's too easy).
